My Blinkie

Creative Misfits

Misfit Fwend's


Blog Trains

Sunday, January 30, 2011
 Lolli Pop Template
hehe check out this yummi lolli pop template i made
all ya gotta do is recolourise the candi part & its CU friendly to


Monday, January 24, 2011
Valentine Angel

This tutorial was written by me on October 31st 2010 Any similarity to any other tutorial is purely coincidentalThis tutorial was written in pspx but should work in other versions.
You will need
A close up tube and a half body tube im using Ismael Rac you can purchase his tubes HERE
Scrap Kit Valentine Angel by Seachell Scrapz its a freebie you can get it HERE
Mask is called rose-with-love it can be found HERE
And a font of choice
Open up a new white image 700 x 700
Open up paper 5 and copy and paste it as a new layer
Layers Load save mask from disk sg_rose-with-love
Layers Merge Group
Copy and paste elemnet 29 as a new layer
open up element 23 and resize it by 75%
copy and paste it as a new layer over the square part of the mask *look at my tag to see what i mean*
open up your close up tube copy and paste it as a new layer
move the close up tube layer under neath element 23 layer
using your magic want click on the circle frame layer then click in the middle of the circle frame
click on the close up layer selections-invert-hit delete on your keyboard select none
duplicate the close up layer
now selecting the duplicated layer
adjust blur - gaussion blur - 3.00
change the blend mode to overlay
select the bottem close up tube change its blend mode to Luminance (L)
change the opacity to 50%
add your half tube under neath the frame layer then duplicate it
close of the duplicated layer above the frame for a minute and click half body layer underneath the frame
select your eraser tool and erase any leg parts that may be longer that the bottem part of the frame
now unhide the top half body layer above the frame still using your eraser
rub away her legs so i looks like shes in the frame but her head is over the top of the frame
now add some elements of your chosing
add your copyrights & your name
and you're all done
thanks for trying my tut
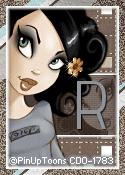
Rainbow Pride

This tutorial was written by me on December 11th 2010 Any similarity to any other tutorial is purely coincidental... This tutorial was written in pspx but should work in other versions.
Tools Needed
2 tubes of choice i am using Pin Up Toons artwork you can purchse there tubes HERE
Mask Corel_07_007
Tools Needed
2 tubes of choice i am using Pin Up Toons artwork you can purchse there tubes HERE
Mask Corel_07_007
Artmamas kit Pride which you can purchase HERE
i used the taggers sized one
And a font of your chosing
Open up a new image 600 x 600
open up pride 14 copy and paste it as a new layer
layers - load/save mask - load mask from disk

layers - merge - merge group
open up embellie 12 and resize it by 75%
now copy and paste embellie 12 as a new layer
now using one of your 2 tubes of choice open it up
copy and paste it as a new layer place your tube under embellie 12
making sure you can only see a face shot behind the square in embellie 12
select the embellie 12 layer grabing your majic wand click inside the square
Selections - Modify - Expand it by 4
Clicking on your tube layer
Selections - Invert - hit Del on your keyboard
Selections - Select None
Open up your other tube of choice copy and paste it as a new layer
make sure its above embellie 12 (see my tag if your unsure what i mean)
open up embellie 48 and resize it by 50%
copy and paste it as a new layer and move it to the right of the black frame (see my tag for where i placed mine)
open up embellie 01 copy it and click on the mask layer and then paste embellie one
open up embellie 02 copy and paste it above embellie 01 and move it up an inch or so
now add some elements of your choosing
Add your copyrights & your name
File save as
thank you for doing my tutorial
Last Christmas

This tutorial was written by me on December 11th 2010 Any similarity to any other tutorial is purely coincidental... This tutorial was written in pspx but should work in other versions.
Tools Needed
Tools Needed
A tube of choice im using a tube from Elias Chatzoudis which you can purchase HERE
Template 27 by Artmama find it HERE
Kit Rudolfina by Tamie get it HERE
Open up artmamas template delete the credit layer and tiny words & tiny words frame layers
open up paper 9 select the large rectangle layer
selections - select all - float - defloat
paste paper 9 as a new layer
selections invert - hit del on your keyboard
selections - select none
open up paper 8 and copy it
click on the bottom rectangle
selections - select all - float - defloat
paste paper 8 as a new layer
selections invert - hit del on your keyboard
selections - select none
click on the top rectangle
selections - select all - float - defloat
paste paper 8 as a new layer
selections invert - hit del on your keyboard
selections - select none
open up paper 5 copy it then click on the white circle layer
selections - select all - float - defloat
paste paper 5 as a new layer
selections invert - hit del on your keyboard
selections - select none
click on the circle back layer
Adjust - Hue & Saturation - Colorize 0-255
click on the square layer
Adjust - Hue & Saturation - Colorize 0-255
click on the sm rectangle layer
Adjust - Hue & Saturation - Colorize 0-255
open up your tube of choice
copy and paste it above the circle layer
duplicate it and hide that layer
selections - select all - float - defloat
click on your tube layer
selections - invert - delete - selections - select none
unhide the duplicated tube layer move it above the frame layer
using your eraser rub of the legs on the tube layer (look at my tag to see what i mean)
add any effects you'd like to your tube
add some elements of your choice
add some text if choice if you like
add your name and copy rights
file save as
thanks for doing my tutorial
Happy Bunny

This tutorial was written by me on April 13th 2010 Any similarity to any other tutorial is purely coincidental... This tutorial was written in pspx but should work in other versions.
Tools Needed
A tube of choice i am using ismael rac's artwork you can purchse his tubes HERE
A font of choice
Happy Bunny scrap kit by dark pheonix designs purchase it @ these stores
Sesnual Posers
Dark Pheonix Designs
open up a new image 600x600
open up happy bunny_9 (the white frame)
open up paper 8 paste as a new layer under neath the
frame
next get your majic wand and click on the frame layer and
click inside the frame
now click on the paper layer then go to selections then click
on modify then click expand and type in 7 then go
selections invert then hit delete on your keyboard
now open up your tube of choice and palce it under the
frame
right click on the tube layer and click on duplicate move the
duplicated layer above the frame then click on the eye
beside it to hide it now click on the frame layer again and
select your majic wand and click inside the frame then click
on the tube layer under neath the frame seletions invert then
hit delete on your keyboard
click on the red circle on the eye with the top tube layer
above the frame and use ur eraser tool to erase the bottem
half of the tube off the frame (look up top for an example)
now open up word art 3 resize it by 65% and place it at the
bottem of the frame (see my tag for an example)
now open up some elements of choice and place them were
you wish
add you name and copyrights
thanks for dong my tutorial
Dearest Friend

This tutorial was written by me on October 15th 2010 Any similarity to any other tutorial is purely coincidental... This tutorial was written in pspx but should work in other versions.
Tools Needed
2 tubes of choice i am using ismael rac's artwork you can purchse his tubes HERE
Tools Needed
2 tubes of choice i am using ismael rac's artwork you can purchse his tubes HERE
Artmamas kit Dearest Friend which you can purchase HERE
i used the taggers sized one
A font of choice
open up artmama's template 24
click on the Lg Rectangle layer selections select
all float then defloat it
open up dearers friend 06 copy and paste as a new layer selections
invert and hit del on your keyboard
selections select none
click on the sm rectangle layer then using your majic wand
paste a paper dearest friend 12 as a new layer
selections invert hit del on your kepboard
select none
click on the lt rectangle layer then using your majic wand
open up dearest friend 4 paste it as a new layer
invert and hit del on your keyboard
selections select none
click on the strips after layer then using your majic wand
open up dearest friend 11
invert and hit del on your keyboard
selections select none
click on the copy of big circle layer then using your majic wand
open up dearest friend 07
invert and hit del on your keyboard
selections select none
click on the sm circles layer
adjust Hue & Saturation- colourize 193/255
paste your tubes of choice were ever you like
add some elements of choice
add your name
add your copyrights and your all done
thanks for doing my tutorial
Alexis

This tutorial was written by me on April 21st 2010 Any similarity to any other tutorial is purely coincidental... This tutorial was written in pspx but should work in other versions.
Tools Needed
A tube of choice i am using Keith Garvey's artwork you can purchse his tubes HERE plus a close up
2 fonts of choice
A mask of choice
Alexis Tagger Size scrap kit by dark pheonix designs purchase it @ these stores
Sesnual Posers
Dark Pheonix Designs
open up a new image 600x600
open up paper 5 copy and paste it as a new layer
choose your mask of choice and load it up
open up Alexis element 35 resize it by 60% copy and paste it as a new layer
copy and paste your close up as a new layer drag it under the green heart layer get your majic wand (clickb on the green heart raster layer) click your majic wand inside the green heart now select your close up layer selections>invert>hit delete on your keyboard selection>select none
double click on the close up raster layer and click on the drop box that says normal and change that to over lay and click ok
open up alexis_element 7 resize it by 30% place it at the bottom left of your tag
add some other elements of choice
then add your tube of choice
add your copyrights and you name
file save as
thanks for doing my tutorial
Registered member of Tut Writers Inc.
I am now proud to Announce i am a member with Tut Writers Inc

wanna get your tuts registered with them to
simply click on there name under the picture to apply today

Saturday, January 22, 2011
Introducing Kelly
yup its almost australia jan *january 26th* so ive made this beautiful little poser to help celebrate australia day
i hope were ever you are or what ever your doing you have a very good aussie day
you can find kelly to purchase her here

Tuesday, January 18, 2011
OMG WERE 2
you dont wanna miss these sales
were turning 2 and you can get things starting at 30 cents
all of my items are 75% untill the end of the month
dont miss out i know i wont be = D
go here to get all the awesome sales


Subscribe to:
Posts (Atom)
About Me
- Rainbow Parrot Scraps
- Hiya = D my names rainbow parrot im a 21 year old aussie who has a huge passion for psp and all that goes with it i make scrap kits, templates & some times ill even make a poser im loving life at the moment i have many great on line friends 1 fur baby tiger *hes such a brat :p* im a misfit *cuz were the coolest kids on the block im a diva... * who dosnt love being diva-liciour right?* i love stalking Xeracx's tube store every friday to see whats new to buy & i love my music so i mix that & psp as often as i can
Stamps I Love

ACDIVA'S

Diva Fwend's


Fav Tut Sites


